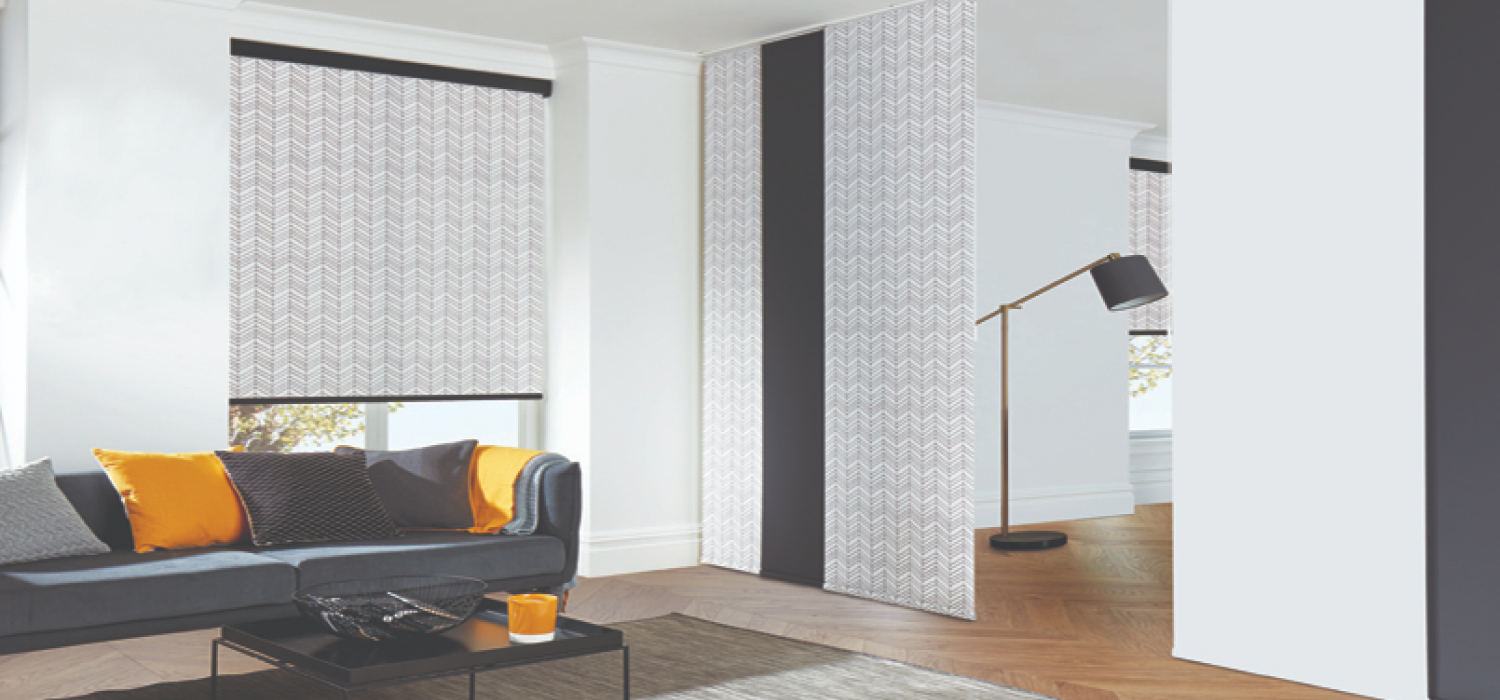
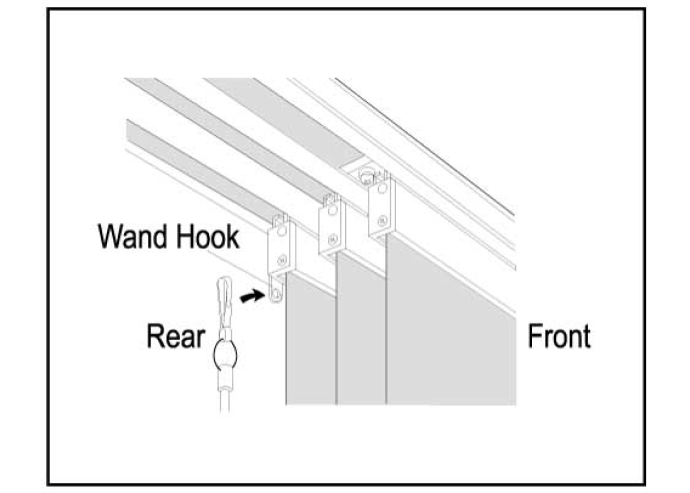
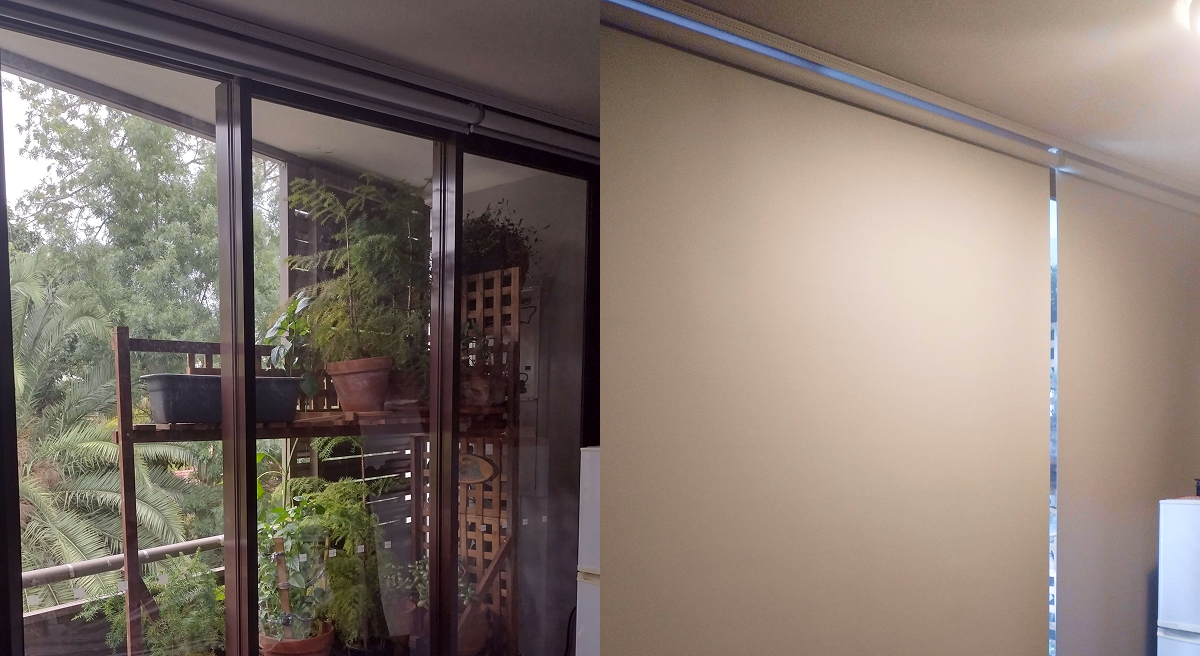
HOW TO INSTALL A ROLLER BLIND​​

Tools You Need

Metal Tape Measure
Pencil
Drill
Spirit Level
Step Ladder

Step 1: We have positioned the controls where you requested during the ordering process.

Step 2: Fitting the bracket options

Top Fitting

Where the brackets are screwed into the top of the reveal

Face-Fixing

Where the brackets are screwed onto a facing surface a wall or window frame

Side-Fixing

Where the brackets are screwed into the side walls of the reveal

Step 3: Fitting the blind

01. Locate the control chain end (the opposite end to the idler round pin end) of the blind into the rectangular ‘lugs’ bracket.
02. Lift the idler round pin end of the blind and slot the round pin into the corresponding hole on the bracket.

Step 4: Child Safety

The cord retaining device must be installed at the maximum distance possible from the control mechanism to prevent looped cords from becoming slack. Place the retaining device on the wall and mark the position of the screw hole(s) with a pencil. Attach the retaining device to the wall using the fixings provided.

HOW TO INSTALL A VERTICAL BLIND​​

Tools You Need

Metal Tape Measure
Pencil
Drill
Spirit Level
Step Ladder

Step 1: Fitting the brackets

There are two types of brackets for vertical blinds, each of which offers a different method of installation:

Top Fitting

Use the single hole in the top of the bracket to fix to the top of the reveal. The protruding tab on the bracket should be closest to the window

Face-Fixing

Join the bracket to the ‘L’ shaped face-fixing plate. Use two screws through the back plate to mount onto a facing surface a wall or window frame
Generic placeholder image
Note:
that the position of the outermost brackets should be at least 5cm away from the ends of the rail, with any other brackets evenly distributed across the width.
Generic placeholder image
If you’re using top-fix brackets:
make sure that you mount them at least 75mm in front of either the window frame, or any protruding vents or handes, if there are any. This allows space for the louvres to turn open and closed.

Step 2: Fitting the blind

Situate the front lip of the headrail into the front of the bracket. Lift the back of the headrail and push up firmly to secure the back of the rail into the bracket.

Step 3: Child Safety - Fitting the card tensioner

Your vertical blind is fully compliant with the latest safety standards. It has been supplied with a ‘P-Clip’ tensioning device to keep the cords and the chain child safe. Slot both the cord and the beaded chain into the ‘P-Clip’ and secure it to the wall or window frame (if you are fixing to the facing surface then the cord and chain will form a figure of eight, this is fine and will not affect the operation of your blind).
Note: Please note that the P-clip must be installed. The cord must be kept under tension to prevent it from sagging down from the headrail when the blind is drawn open.

HOW TO INSTALL A PANEL GLIDES​​

Tools You Need

Metal Tape Measure
Pencil
Drill
Spirit Level
Step Ladder

Step 1: Fitting the bracket options

The brackets offer two methods of installation:

Top Fitting

Where the brackets are screwed into the reveal

Face-Fixing

Where the brackets are screwed onto a facing surface a wall or window frame

Step 2: Joining the tracks (if supplied)

If your track is less than 2600mm wide, skip to step 3.
If your width is greater than 2600mm, you will be provided with 2 tracks and a joining plate to connect them together.
Slot the joining plate into the channel at the top of one part of the rail, then slot the other part of the rail into place beside it, ensuring that the joining plate is central. Then insert the provided screws into the holes in the fixing plate and screw in tightly to secure the rails together.

Step 3: Fitting the track

Rest the front lip of the headrail in the front lip of the bracket.
Then twist the back of the headrail upwards until it snaps into place in the rear hook of the bracket.
Finally, hook the control wand through the eyelet at the end of the rearmost glider.
For wider tracks with more panels, hook the front hook of the bracket over the centre lip of the headrail, rather than the front lip.

Step 4:Attaching the fabric

Fold the top of the panel width wise along the plastic spline
Unscrew the end cap on the relevant top rail
Insert the folded section of the blind into the top rail
Replace the top rail end cap

HOW TO INSTALL TIMBER LOOK VENETIANS​​

Tools You Need

Metal Tape Measure
Pencil
Drill
Spirit Level
Step Ladder

Step 1: Installing inside the window frame

Top Fitting

At top of window frame, measure 70mm in from each side and 39mm back from front of window frame and mark with a pencil; this is the centre back of the outer brackets. Place brackets in position and mark where the 2 screws will go. We recommend drilling pilot holes for the screws using a 2mm bit. Fix the brackets into position using 2 long screws for each bracket. If more brackets are supplied, space them evenly between the first two brackets.

Face-Fixing

Measure 70mm in from top left and top right of where the blind will sit and mark with a pencil; this is the centre of where the brackets will go. Place brackets in position (normally flush with top of architrave) and mark where the screws will go. We recommend using a spirit level to align brackets if not installing on the architrave. We recommend drilling pilot holes for the screws using a 2mm bit. Fix the brackets into position using 2 long screws for each bracket. If more brackets are supplied, space them evenly between the first two brackets.

Step 2: Install Blind

01. Hold down brackets (If Ordered)
Installing inside the window frame... Position hold down bracket vertically inside window frame where the bottom rail hangs naturally, mark where the 2 screws will go. We recommend drilling pilot holes for the screws using a 2mm bit. Fix bracket into position using 2 medium screws. Insert bracket knob into bottom rail. Repeat for bracket at other end of bottom rail.
Installing outside the window frame... Position hold down bracket horizontally outside window frame where the bottom rail hangs naturally, mark where the 2 screws will go. We recommend drilling pilot holes for the screws using a 2mm bit. Fix bracket into position using 2 medium screws. Insert bracket knob into the bottom rail. Repeat for bracket at other end of the bottom rail.

Step 3:

Attach the Child Safety Cleats to the wall at least 1600mm off the ground using medium screws for each cleat. Ensure the cleat is fixed firmly. Tie all the loose lift cord around the Child Safety Cleat at all times.

Step 4: Attaching the fabric

01. Fold the top of the panel width wise along the plastic spline
02. Unscrew the end cap on the relevant top rail
03. Insert the folded section of the blind into the top rail
04. Replace the top rail end cap